Last Updated: October 30, 2026
Quick Summary
Renovating exterior of 1970s home projects should start with inspecting the building envelope for moisture and damage, since hidden rot and failing windows are common in homes of this era. Fix water problems first, then set a budget, match the design to the home’s architecture, and sequence windows before siding.
- Fix hidden moisture and rot before any cosmetic upgrade, because paint over active water damage will fail early.
- Ask every contractor to quote repairs per item and confirm demolition, disposal, and permits are included.
- Install windows before siding so the new siding can be flashed correctly around them.
- Keep the original roofline and use one unified siding color across all planes on split-level homes.
- Verify contractor insurance directly with the insurer, not just from a copy of the certificate.
Table of Contents
- Why a 1970s Home Needs a Different Exterior Plan
- Step 1: Inspect the Building Envelope for Moisture and Damage
- Step 2: Set a Budget and Understand Exterior Renovation Cost Drivers
- Step 3: Choose 1970s Home Exterior Renovation Ideas That Match the Architecture
- Step 4: Decide Between Window and Siding Replacement Sequencing
- Step 5: Vet a Siding Replacement Contractor Before You Sign
- Step 6: Plan the Permits, Energy Upgrades, and Project Timeline
- Booking Your Free Estimate for Your 1970s Home
- Frequently Asked Questions
Owners of 1970s homes face a different exterior problem than owners of newer houses, and renovating exterior of 1970s home projects must account for that difference from the start. Many of these homes were built with wood siding, single-pane windows, and roof assemblies that have now reached the end of their useful life. Before you pick colors or add stone columns, you need to know what is happening behind the walls.
Why a 1970s Home Needs a Different Exterior Plan
A 1970s home is not just an older version of a modern house. Its exterior was designed around materials and building practices that have changed a lot since then.
Recent trend data points to strong interest in exterior character.
Renovating exterior of 1970s home work goes best when the steps below follow a clear order: inspect, budget, design, then install.
Common starting points for 1970s homes:
- Original wood or early vinyl siding that is brittle or rotting
- Older single-pane or failing double-pane windows
- Trim, soffits, and fascia showing water damage
Step 1: Inspect the Building Envelope for Moisture and Damage
The building envelope is the part of the house that keeps weather out: siding, sheathing, windows, doors, roof, and flashing.
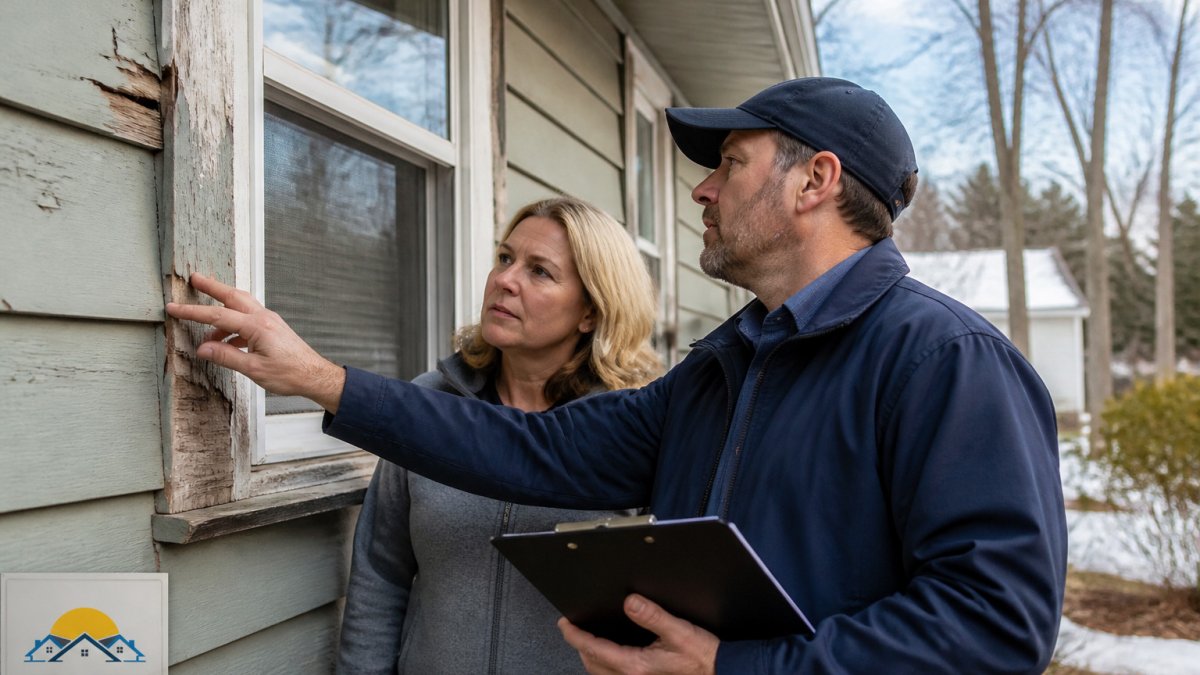
Start with a walk around the house. Our guide to spotting water behind siding walks through each check in order.
Check these areas first:
- Window and door head flashing
- Corners where two siding types meet
- Areas near downspouts and grade level
If you see signs of water entry, get a professional inspection before you start cosmetic work. Painting over rot only hides the problem and makes repairs more expensive later.
Step 2: Set a Budget and Understand Exterior Renovation Cost Drivers
Exterior renovation costs vary widely, but that does not mean you should walk into the project without a range. The biggest drivers are the amount of hidden damage, the size and complexity of the home, the materials chosen, and how much work is bundled into one contract.
Typical planning bands for common exterior projects (national U.S. averages; your local labor market and the condition of your home will move these up or down):
- Exterior paint: pricing depends on the size of the home, the condition of the surfaces, and the materials chosen. Request a written estimate for your home.
- Vinyl or fiber-cement siding replacement: roughly $8 to $14 per square foot installed for vinyl and $10 to $18 per square foot installed for fiber cement, so a 1,500-square-foot exterior wall area commonly falls between $12,000 and $27,000 before repairs.
- Full window replacement: roughly $500 to $1,200 per window installed for standard double-pane units, with larger openings, tempered glass, and custom sizes pushing toward the top of that band.
- Roof replacement: roughly $6,000 to $15,000 for an asphalt shingle roof on a typical single-family home, with steeper pitches, multiple layers to tear off, and complex flashing adding cost.
What actually drives the number up or down:
- Hidden damage. Rot behind siding, failed sheathing, and deteriorated trim are the most common budget surprises on 1970s homes. Ask every contractor to quote repairs on a per-item basis so you can see what is included.
- Access and height. Two-story walls, steep roof pitches, and tight side yards require scaffolding, lifts, or more labor hours.
- Material grade. Builder-grade vinyl and standard asphalt shingles sit at the low end; fiber cement, engineered wood, and standing-seam metal sit at the high end and usually carry longer warranties.
- Bundling. Replacing windows and siding in one contract often costs less than two separate mobilizations because the crews can coordinate flashing and trim.
- Permits and disposal. Dumpster rental, permit fees, and disposal of old materials are frequently omitted from low bids. Confirm they are line items.
Prioritize in this order:
- Repairs that stop water damage
- Window and door replacement where drafts or moisture are a problem
- Siding and trim replacement
- Cosmetic upgrades like paint, lighting, and landscaping
When you compare quotes, check whether each one includes demolition, disposal, permits, and repair of hidden damage. A lower quote that leaves these out is not a true bargain.
Do not let a contractor talk you into a cosmetic finish before the envelope is repaired. Paint and siding installed over active moisture problems will fail early and cost more to fix the second time.
The article gives these planning bands for common exterior projects, which are national U.S. averages.
| Project | Planning band | Note |
|---|---|---|
| Vinyl siding replacement | $8 to $14 per sq ft installed | Installed price |
| Fiber-cement siding replacement | $10 to $18 per sq ft installed | Installed price |
| Full window replacement | $500 to $1,200 per window | Standard double-pane units |
| Roof replacement | $6,000 to $15,000 | Asphalt shingle, typical home |
| Landscaping refresh | $1,500 to $5,000 | Basic bed cleanup, mulch, shrubs |
Step 3: Choose 1970s Home Exterior Renovation Ideas That Match the Architecture
A 1970s home is not one style. Ranch, split-level, and contemporary 1970s forms each have their own visual logic, and the best exterior ideas work with that logic instead of erasing it.
Common 1970s home forms and what to preserve:
- Ranch (single-story, low roofline, wide footprint). The defining features are horizontal lines, a low-pitched roof, and often a deep front overhang. Preserve the horizontal emphasis with lap siding, long trim boards, and low-profile light fixtures. Avoid adding tall columns or a two-story entry that fights the roofline.
- Split-level (staggered floors, short façade, attached garage). The challenge is that the façade is broken into offset planes. Use one siding color across all planes to unify the house, and let trim and the garage door carry the accent. A common mistake is painting each level a different color, which makes the house look smaller and busier.
- Contemporary 1970s (asymmetrical rooflines, large glass, wood accents). These homes were designed around indoor-outdoor connection. Keep large window openings and consider restoring or adding natural wood at the entry, soffits, or garage door rather than covering the façade in stone veneer.
Design moves that work across all three forms:
- Keep the original roofline and refresh the palette with a deeper, more modern color. A dark charcoal, deep green, or warm bronze on the body with a lighter trim is a reliable update for 1970s brick and siding.
- Add natural wood accents at the entry or garage door. Cedar and thermally modified wood are common choices because they weather well and suit the era.
- Update exterior light fixtures to a simpler, period-appropriate style. Rectangular or cylindrical fixtures in matte black or bronze read as modern without looking trendy.
- Refresh trim and shutters rather than replacing the whole façade. Wider trim boards and simplified shutters often do more for curb appeal than a full re-side.
What to avoid:
- Stone veneer and entry columns applied to a simple 1970s ranch often look out of place and can date the house to a different decade.
- Barn-style sliding doors, faux timber trusses, and modern farmhouse fixtures fight the original architecture.
- Covering large window openings with smaller windows removes one of the home’s best features and can make interior rooms darker.
A design response does not need trendy materials to look current. The goal is to make the house look cared for and coherent, not to make it look like a new build.
Take a photo of your home from the street and sketch two or three color schemes on top of it before you commit. Seeing the palette at façade scale prevents expensive mistakes.
Step 4: Decide Between Window and Siding Replacement Sequencing
Windows and siding are often replaced together, but the order matters. Install windows first so the new siding can be flashed correctly around them. Replacing siding first can leave gaps where new windows meet old wall sheathing.
Replacing windows first is usually the better sequence because it:
- Lets installers correct any rough-opening problems before siding goes on
- Reduces the chance of water intrusion at the window perimeter
- Keeps the siding crew from working around exposed window openings
Ask your contractor how they plan to flash each window. Proper flashing is one of the most important details in the whole project.
Step 5: Vet a Siding Replacement Contractor Before You Sign
Hiring the right contractor is the step that decides whether the rest of the project goes well. Poor siding work can leave gaps that let water in, and that damage may not show up for years.
Before you sign, ask for:
- Proof of current licensing and liability insurance
- Proof of workers’ compensation coverage
- Written warranty terms for both labor and materials
- At least two references from recent exterior projects on homes of similar age
Verify insurance directly with the insurer, not just with a copy of the certificate. Our guide to verifying contractor insurance explains each step. If you want to compare what different installers cover, see our asphalt roofing installation quote checklist.
Ask for written warranty terms and references from past projects so you can check the work before you commit.
Step 6: Plan the Permits, Energy Upgrades, and Project Timeline
Many exterior projects need permits, and the rules differ by town. Your contractor should know which permits apply and should handle the filing.
Energy upgrades can also affect how you plan the project. Department of Energy explains how to evaluate home energy improvements DOE Energy Saver guide to home improvements.
For the timeline, plan for weather delays. Siding and window work depends on dry conditions, so a project can run longer than planned in wet seasons.
Booking Your Free Estimate for Your 1970s Home
Renovating the exterior of a 1970s home is a big job, but it is manageable when you take it one step at a time. Start with a careful inspection, set a realistic budget, and pick a design that fits the house.
When you are ready, request a free estimate from All Weather Exteriors LLC. We will inspect your home, explain what we find, and give you a written quote with no obligation.
Frequently Asked Questions
How do you modernize the exterior of a 1970s home?
Start with the elements that age worst: worn siding, dated windows, and tired trim. Replacing those with energy-efficient products and refreshing the paint palette usually modernizes the look without fighting the home’s original ranch or split-level lines. Keep the roofline and major massing intact where possible, since those define the house’s character. Pair material upgrades with updated lighting fixtures and new house numbers for an immediate lift in curb appeal.
How much does it cost to renovate a home’s exterior?
Exterior renovation cost depends on the square footage of siding, the number and size of windows, the condition of the underlying sheathing, and the materials you choose. Because pricing varies by project scope, the most reliable figure comes from an on-site inspection and written estimate. Ask any contractor to itemize materials, labor, permits, and waste removal so you can compare bids on equal terms. For current pricing on your home, request a free estimate from All Weather Exteriors LLC.
Should you replace the siding or windows first on a 1970s home?
Address moisture problems first, then sequence the work so windows are installed before or alongside new siding. Installing new windows after siding can leave flashing and trim gaps that let water in. If your energy bills are the main concern, windows usually deliver the larger heating benefit, while siding protects the wall assembly. A licensed contractor can confirm the right order after inspecting the wall condition.
What should you inspect before replacing siding on an older home?
Check for rot in sheathing and framing, soft spots near grade and around windows, peeling paint that hides moisture, and any gaps where water could enter. Look for failed caulk, damaged flashing, and signs of insect activity. Older homes may also contain lead paint, so ask whether your contractor follows lead-safe work practices required under federal EPA rules for pre-1978 housing. Repairing hidden damage before new siding goes on prevents expensive callbacks.